 |
| Thanks to help from Jim Cronin and others, the Bear Creek Skunk Works Wing Rotisserie 3000 is now in action! |
Friday, June 29, 2012
Work Session 6/28/2012 - BCSW Rotisserie Complete

Saturday, June 23, 2012
Work Session 6/23/2012
Good progress was made on a number of fronts this morning:
1. We fabricated a trial new floorboard from 0.025" aluminum sheet. The final part will be made from 0.032" sheet and include a doubler over part of the surface to provide more stiffness. We decided also to add four more tabs on the lower frame tubing to secure the floor and distribute loads better. Trials getting into the plane showed that a single sheet, even with stiffeners made from angle reinforcement would be insufficient.
2. Work on a steel 'rotisserie' was begun. This will be used to secure the wings during painting of silver and final coats, yet allow one person to rotate a wing during painting.
3. Modifications to the airbox, purchased from Van's Aircraft, were begun. The mounting plate must be adjusted to our carburetor, and the entire plenum must be mounted to counterbalance the angular offsets built into the engine.
4. Sheet metal work on the RV-7 wings was continued.
At our next work session (date and time TBD), we'll continue on all of these projects, and begin fabrication of the seat backs and seat pans. Once the wing rotisserie is complete, the wings will get their coats of silver paint,

Chuck Borsuk holds the floorboard sheet while J-P Bernoux works the shear. Yes - that is corrosion on this sheet of 0.025" aluminum! This part was a trial only used to test some ideas; the final part will be fabricated from new 0.032" sheet.

Chuck, J-P and Michael Crowder cut some metal. The shear sure makes this easy!

Chuck smooths the corners of angle reinforcements cut in the shear and bent in the brake,

Andy Thompson cuts some small brackets needed for the airbox.

Michael and Chuck make final trip adjustments and debur the floorboard.
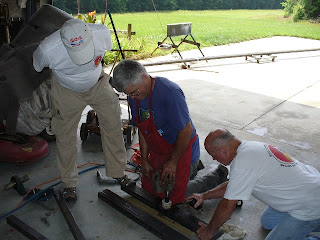
J-P, Terry and Mike McCann work on parts for the wing rotisserie.

Michael and Chuck test fit the new trial floorboard.

It fits! The trial floorboard will be used as a pattern for the final part made of thicker gauge aluminum. Copper clecos hold a reinforcing angle on the underside in place.
1. We fabricated a trial new floorboard from 0.025" aluminum sheet. The final part will be made from 0.032" sheet and include a doubler over part of the surface to provide more stiffness. We decided also to add four more tabs on the lower frame tubing to secure the floor and distribute loads better. Trials getting into the plane showed that a single sheet, even with stiffeners made from angle reinforcement would be insufficient.
2. Work on a steel 'rotisserie' was begun. This will be used to secure the wings during painting of silver and final coats, yet allow one person to rotate a wing during painting.
3. Modifications to the airbox, purchased from Van's Aircraft, were begun. The mounting plate must be adjusted to our carburetor, and the entire plenum must be mounted to counterbalance the angular offsets built into the engine.
4. Sheet metal work on the RV-7 wings was continued.
At our next work session (date and time TBD), we'll continue on all of these projects, and begin fabrication of the seat backs and seat pans. Once the wing rotisserie is complete, the wings will get their coats of silver paint,

Chuck Borsuk holds the floorboard sheet while J-P Bernoux works the shear. Yes - that is corrosion on this sheet of 0.025" aluminum! This part was a trial only used to test some ideas; the final part will be fabricated from new 0.032" sheet.

Chuck, J-P and Michael Crowder cut some metal. The shear sure makes this easy!

Chuck smooths the corners of angle reinforcements cut in the shear and bent in the brake,

Andy Thompson cuts some small brackets needed for the airbox.

Michael and Chuck make final trip adjustments and debur the floorboard.

J-P, Terry and Mike McCann work on parts for the wing rotisserie.

Michael and Chuck test fit the new trial floorboard.

It fits! The trial floorboard will be used as a pattern for the final part made of thicker gauge aluminum. Copper clecos hold a reinforcing angle on the underside in place.
Saturday, May 19, 2012
Work Session 5/12/2012
Terry, Kent and J-P took advantage of the perfect weather - dry and cool - to apply a coat of PolyBrush to the horizontal stabilizers, the final step before three coats of silver. The stab served as a teaching lesson on spraying, which went well thanks to the controlled environment of Terry's spray booth. The images below show how it's done.

Terry prepares the spray equipment which he keeps in a solvent following each use to assure absolute cleanliness. Even the smallest speck can clog the spray head.

Spray painting results in a fine atomization of pigment and its solvent quickly evaporates. Even outside the spray booth we donned air masks with new activated-charcoal filters. Here J-P prepares his lungs and his camera. Note in the background that all important tools, airplane parts, etc. have been covered. Some fine paint particles will find their way outside the paint booth despite all precautions to the contrary.

Terry carefully applies one coat of Polybrush, traversing the surfaces in two different, overlapping patterns to assure complete coverage. Important is the rig he created to hold the components, leaving his hands free for painting.

Terry prepares the spray equipment which he keeps in a solvent following each use to assure absolute cleanliness. Even the smallest speck can clog the spray head.

Spray painting results in a fine atomization of pigment and its solvent quickly evaporates. Even outside the spray booth we donned air masks with new activated-charcoal filters. Here J-P prepares his lungs and his camera. Note in the background that all important tools, airplane parts, etc. have been covered. Some fine paint particles will find their way outside the paint booth despite all precautions to the contrary.

Terry carefully applies one coat of Polybrush, traversing the surfaces in two different, overlapping patterns to assure complete coverage. Important is the rig he created to hold the components, leaving his hands free for painting.
Tuesday, May 8, 2012
Monday, May 7, 2012
Work Session - 5/4/2012
Terry, J-P and Kent added some small tape reinforcements to the horizontal stabilizer. Next comes the silver coat, which will hopefully start this week with cooler weather forecasted.
The seat bottom and back have been mocked up with plywood and butt-tested by many BCAC members. The angles and dimensions used are very close to those on Terry's RV-9 and corresponded with "best-practices" from leading textbooks on aircraft design. Next comes fabrication of the seat bottom and back as well as the seat cushions.

Terry adds a small reinforcement tape to the horizontal stabilizer.

The seat bottom and back have been mocked up with plywood and butt-tested by many BCAC members. The angles and dimensions used are very close to those on Terry's RV-9 and corresponded with "best-practices" from leading textbooks on aircraft design. Next comes fabrication of the seat bottom and back as well as the seat cushions.

Terry adds a small reinforcement tape to the horizontal stabilizer.

Seat bottom and seat back mocked up and in place. We gained two additional inches of headroom by dropping the base of the seat back into the original curved seat pan. Visibility out the front remains good. Entry and exit remains a challenge, c'est la vie!
Saturday, March 10, 2012
Work Session 3/9/2012 - right wing taping session
Proving that our team is learning quickly, the right wing has received its tapes in one afternoon session and is nearly ready for the silver coat. Pictures below show the good teamwork exhibited at the Skunk Works this past week. Thanks J-P Bernoux for the pictures!
Great News! Van's original airplane, the RV-1, will make a stop at the Skunk Works during its tour of the country on April 22nd or 23rd. Read about the restoration and tour at this link. Stay tuned for details!

Konrad, Terry and Kent prepare to lay down tapes.

Andy, Kent, Jim hard at work watching Chris do the hard work.

Chris and Terry add the last strip of rib tape before a final bit of rib stitching.

Andy, Chris and Terry at work on the always-challenging curved surfaces.
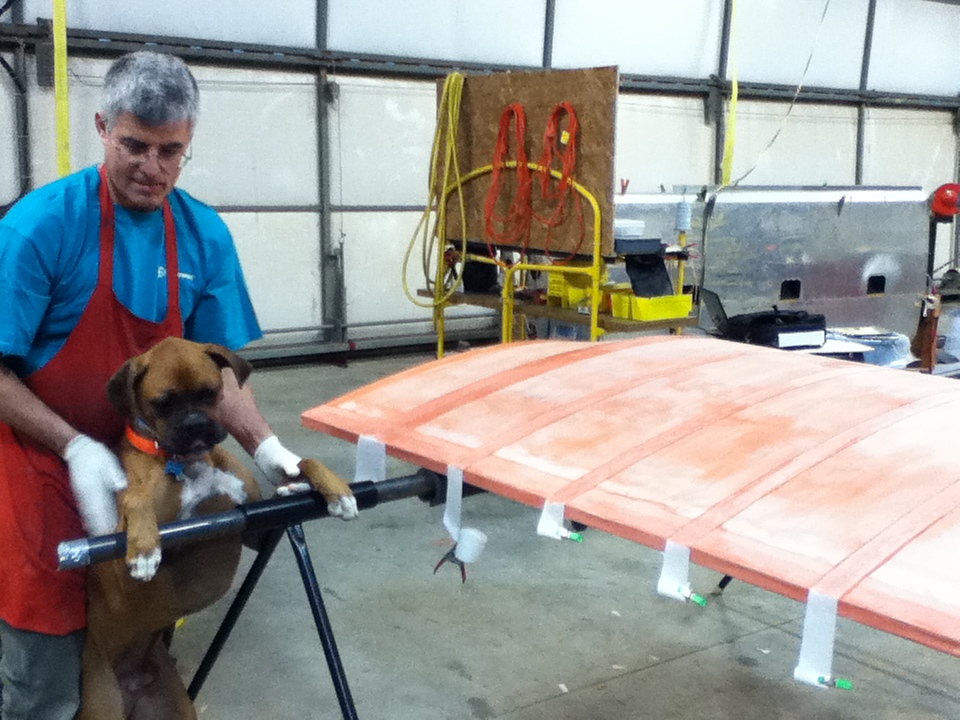
Below: Tucker the Wonder Dog inspects our work.

Great News! Van's original airplane, the RV-1, will make a stop at the Skunk Works during its tour of the country on April 22nd or 23rd. Read about the restoration and tour at this link. Stay tuned for details!

Konrad, Terry and Kent prepare to lay down tapes.

Andy, Kent, Jim hard at work watching Chris do the hard work.

Chris and Terry add the last strip of rib tape before a final bit of rib stitching.

Andy, Chris and Terry at work on the always-challenging curved surfaces.
Below: Tucker the Wonder Dog inspects our work.
Thursday, March 1, 2012
Work Session 2/29/2012 - Final Touches before Silver Coat
Warm weather allowed Terry, Andy and Kent to put the final touches on the left wing. This included applying bias tape around the wing tip bow and 6" tapes on the entire leading edge. We also repaired the two small tears in the right wing, providing another good learning opportunity. As in the past, we followed the excellent guidelines in the Poly Fiber manuals.
While we progress on the Stits SA-7D Skycoupe, a group of RV builders in Texas have been preparing another highly-modified Stits design, the SA-3 Playboy, for a tour of the US this spring and summer. We know the airplane as the RV-1, the first of Dick Van Grunsven's amazingly popular line of aircraft. Earlier this week, the EAA ran a webinar including Van, who described the evolution from the the Playboy to the RV-1 that is worth watching.
You can find a link to the webinar here.
While we progress on the Stits SA-7D Skycoupe, a group of RV builders in Texas have been preparing another highly-modified Stits design, the SA-3 Playboy, for a tour of the US this spring and summer. We know the airplane as the RV-1, the first of Dick Van Grunsven's amazingly popular line of aircraft. Earlier this week, the EAA ran a webinar including Van, who described the evolution from the the Playboy to the RV-1 that is worth watching.
You can find a link to the webinar here.

One RV-7 wing tank completed.

Our newly-fabricated exhaust stacks just returned from Larry Vetterman's Idaho shop. Compare them to the original stacks (darker colored). Larry's Vetterman Exhaust is considered one of the finest shops of its kind in the US, and he supplies most exhaust systems for RVs.

Terry and Andy apply the 6" leading edge tape.

The most difficult part of the work was the need for darts at the 'break' between the leading edge and the 'notch' at the wing root.

Don't they look nice? The left wing is now ready for its silver coats.

Terry smooth the pinked edges of one of the two patches applied on the right wing.
Below - the final results of one of these patches - more complicated than it looks to get things smooth and aligned with other tapes.


Subscribe to:
Posts (Atom)