A Stitts Skycoupe Restoration Project

The Stitts Skycoupe is also known as Stitts SA7 D

Sunday, October 30, 2011

RV-7 has a new home - BCAC

Terry, Mike, Andy, Joel and Kent were up at the crack of dawn today (10/30/2011) to load up our Club's latest acquisition, an RV-7 project donated by Mr. Andrew Meyers of Apex. The tailfeathers are largely complete and the wings are about 50% complete. All of the parts are now safely stored at the Skunkworks and we'll be discussing future plans with this latest project at upcoming meetings.

The images below are from the last few work sessions.


The BCAC RV-7 wings in the custom-built, roll-able cradle before being stowed in the Skunkworks.


Nathan McConnell and his father made one last visit to the Skunkworks before Nathan headed for A&P school in Portland, Oregon.


Joel, Andy and Terry put the finishing touches on the undersurface of the left wing.


Terry, Martha and Mike practice rib stitching.

Below: New tool storage cabinet, parts bins and overhead lighting underneath the storage shelves.

Saturday, October 29, 2011

Work Sessions 10/26-30/2011

On 10/26/2011, the lower surface of the left wing was covered by Terry, Andy, Joel, Mike McCann, JP and Kent.

On 10/27/2011, the upper surface of the left wing was covered by Terry, JP, Mike, and Jim Cronin.

On 10/29/2011, Terry, Al Sutton, Mike & Martha, and Joel completed covering details on the left wing, and finished all shrinking. We have now both wings ready for Polybrush, then rib stitching.

Also on 10/29/2011, Kent, Tim and Andy mounted a nice cabinet, donated by Andy, that will be used to store tools and other small items from our projects. Tim and Kent mounted parts bins to the nearby wall and sorted AN fasteners. Konrad sorted a variety of small parts that were acquired with the BD-4.

After working on the 10/29/2011, our group adjourned to our favorite Mexican restaurant in Pittsboro and held a long and lively discussion on the incorporation of the Club and what sort of activities we can pursue in the future.

Monday, October 24, 2011

Larry Oppegaard's Sonerai Project

Our Skycoupe's previous owner, Larry Oppegaard, was so inspired by what he saw at the Skukworks, that he recently acquired a Sonerai project, one of John Monnett's (Sonex/Waiex) best-known early designs. Larry send comments and imagees below on the airframe and engine.

Thanks for sending the article about the Sonerai. I saw that there were a lot more items of interest in the Experimenter newsletter, so I re-joined EAA. I had been a member since about 1972, then let it go back in 1995. I’m glad to get involved again.

I have stripped my Sonerai project down to the bare fuselage frame, and will repaint it with white epoxy. I need to fabricate the front seat frame and flight controls, which someone had removed earlier. The wings need nothing, so they are just stored against my garage wall. I need to find a welding rig for borrowing or renting to weld up the steel tubes.

The engine is an 1834cc VW conversion with a Zenith carb. The wings, which fortunately need no work, are all aluminum. I flew one back in the 90’s and it was very responsive, with a top speed of 130 mph in level flight. The Sonerai is stressed for basic aerobatics. The wings can be made to fold for trailering, but mine doesn’t. There are several U-tube videos available.

Best Regards,

Larry


Work Session 10/19/2011

The Wednesday work session went pretty well. Andy, Jim, Paul, Mike, Martha, Kelly and I forget her husband's name were there. We did our last practice stitching then uncovered the wing in preparation for recovering. We got the sheet aluminum measured and put away. We started fabricating an attachment to the fuselage rotating jig to hold the wing vertical. I finished this new jig Thursday and think it will expedite the stitching process. I was interested in having two evening sessions to recover the wing next week, and then maybe one on Sat. to get everything polybrushed (temperature dependent). We can then take stock of our supplies and see how much more fabric we need.
Terry

Thursday, October 13, 2011

Work Session 10/12/2011 - Rib Stitching Workshop

Due to a few small, but critical flaws in the covering of the airplane's left wing last weekend, it will need to be recovered. This was the conclusion of our Technical Counselors, Jack Phillips and Terry Gardner, with confirming input from the PolyFiber expert, Jerry Stadtmiller of BIPE Inc. in Andrews, NC. Fortunately, we have plenty of material to do this. The good news is, this provides us with an ideal means to learn how to rib stitch.

We held our first such session on 10/12/2011, which saw a number of BCAC members mastering the starter knot, the modified seine knot and the finishing knot. The images below show the steps taken. Note that in the actual rib stitching of our wings, the fabric will have first received coats of PolyBrush (pink stuff) and rib tapes will be affixed over the ribs prior to stitching. The next rib-stitching workshop will be held this coming Saturday afternoon. Anyone interested is invited. NOTE - If you have one of our four copies of the PolyFiber guidebook, please bring it back to the shop.

In preparation, please read the PolyFiber handbook (if you have a copy) and study these three short videos from PolyFiber:

http://www.eaavideo.org/video.aspx?v=22167622001
http://www.eaavideo.org/video.aspx?v=22430488001
http://www.eaavideo.org/video.aspx?v=23753223001

You'll see some other videos on fabric covering at this link, see all pages of videos as they are mixed with tube-related videos.
http://www.eaavideo.org/channel.aspx?ch=ch_hints_tubefabric


First, a rib template was made from cardboard, using the steel template that had served to cut the wing ribs. We chose a 2" distance between stitches. These are marked along the upper edge of the template, then straight lines are drawn to the somewhat closer marks along the lower surface of the template.


Here, Terry transfers the cardboard markings onto the front and back of our flexible aluminum spline. These are used to mark the inboard and outboard ends of chalk lines for the upper and lower wing surfaces.


Joel, Nathan, Mike and Terry discuss the next steps, snapping chalk lines down the span of the wing's upper and lower surfaces at each stitch mark.


The under surface of the wing with snapped chalk lines. We then used the sharp end of the needles to pre-punch a hole on either side of each rib where a chalk line crossed. Special thought was given to internal obstructions, especially the two spars.


Martha and Mike had practiced at home and became tutors for others, along with the step-by-step procedures in the PolyFiber guidebook.


When followed closely, after a few tries the directions in the PolyFiber manuals make sense.


While Mike pre-punches the holes, Joel drills through the outboard rib reinforcement which would otherwise block the rib stitching.


Nathan was a quick study. The lamp under the wing really helped in finding the right place to penetrate the fabric.


Here, late-comer Konrad is aided by quick-study Nathan.


Above and below: With practice done for the evening, we gave some thought to the placement of the new panel using the old one as an example.

Sunday, October 9, 2011

Work Session 10/9/2011

Yesterday saw nine people hard at work at the Skunk Works from 9-7. The left wing and rudder were covered, and it is clear that our skills are improving. The images below show this.

What's next? The newly-covered surfaces will receive a coat of PolyBrush to seal the fabric. Next, we'll be learning the fine art of rib-stitching, which will take quite a bit of time and is one of the more critical parts of homebuilding that must be done 100%, or not at all.

Once the rib-stitching is done, the covered surfaced will receive a few coats of UV-blocking silver paint, then they'll be hoisted into the rafters until the spring. Attention will then switch to the many tasks remaining on the engine and fuselage. We're now 80% done, with 80% to go!


Nathan and Andy make a few final touches to the wing before covering.


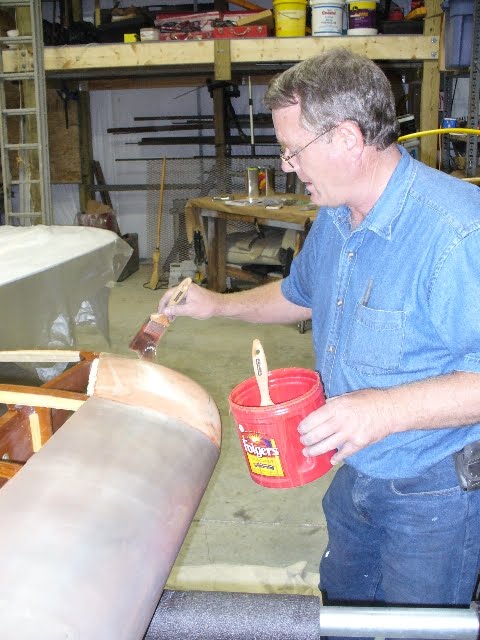
Andy applies a coat of PolyBrush to all surfaces where the fabric will be attached.


Al and Terry plan the procedure to attach cloth to the lower surface. We started by gluing it to the trailing edge, then gluing to the leading edge and onto the stringers just below the aluminum leading edge. This way, the only seam that shows is on the under surface.


Much of the process requires the help of 3-4 people. Here Terry holds cardboard under the brush to prevent spillage onto the clean fabric. Paul and Al hold the fabric in position while Joel carefully "paints" a one inch stripe of PolyTack.


The wing root and wing tip pose the greatest challenges. Here, Paul assists Terry in the cutting and placement of the ends of cloth around corners.


Before using them, irons must be accurately calibrated. Terry demonstrates how this is done.


When we finally started shrinking the cloth - the best part of covering - all of the hard work was over. As Joel shrinks the fabric on the underside of the wing, Chris, Al and Nathan enjoy the magic.


Al takes a turn at shrinking the fabric, first at 250 degrees then at the final setting of 350 degrees.


Nathan, who will be leaving us soon for A&P school in Portland, Oregon, became quite proficient at the iron. This will come in handy for this bachelor!


While most worked on the left wing, Konrad and Andy covered the rudder. While the overall size of the part was small, it was quite complicated due to the small size of tubing, sharp curvature and several tabs to negotiate.

Below: Proud of our work, we took a short field trip to Chris McClure's Husky to see how the pros cover an airplane. It was obvious that we have much to learn!


Bill Buyak's Skycoupe

The appearance of my article on our effort in the October, 2011 issue of EAA Sport Aviation prompted another Skycoupe builder, Bill Buyak of Lehigh Acres, FL, to write. Below you'll find Bill's interesting comments and a few pictures.

Dear Kent,

What a pleasant surprise to see your article in Sport Aviation. it reminded me of my old days when I constructed the same Stits Skycoupe Model SA-7D in the cellar of my house and had my first flight, April 1972. My original engine was a Franklin Sport-4 supposedly rated for 125 horse power, but was more realistically a 100 horse power engine. After about 5 years of flying I replaced the Franklin engine with a Lycoming 0-320, 150 horse power engine. That engine made a world of difference. It gave me a cruise speed of about 130 MPH. I flew the plane for 25 years, all landings were scheduled, and the airplane #N3834, is now on permanent display at the ESAM (Empire State Aerosciences Museum) Rt. 50, 130 Saratoga Road, Scotia, New York, 12302.

SUGGESTIONS:

1. I would very strongly suggest that you do a rough assembly of the airplane and put it on scales to calculate the center of gravity (CG). My experience indicated that the Stits design produced a CG moment that was too far aft. As a result, I had to redesign the engine mount to move the engine forward and also relocate the battery to the engine compartment to bring the CG within the design limits.

2. I narrowed the nose fuel tank because it pushed the instrument panel too far forward, essentially putting the instrument panel in your lap. As you know, you need a certain amount of depth behind the panel to accommodate the instruments. A wing fuel tank was added of about 7.5 gallons to replace the lost capacity of the smaller nose tank

3. My plane was rigged for night flight, so if you have this in mind, be sure to make provisions during your construction phase.

Also, be sure to include provisions for your radios and their antennas. I located my receiving antenna in the vertical tail fin and the transmitting antenna in the belly. The transmitting antenna was located in the center of an aluminum sheet, filling a section of the fuselage. This aluminum plate acted as a ground plain which is necessary for good transmitted signal strength.

4. Wing struts, I used streamline tubing.

5. Flight characteristics: a stall is gentle and must be aggravated, otherwise normal flight is very stable and well behaved. Approach speed for landing I found to be 80 MPH over the fence and below that speed the airplane sinks really fast. It is important to maintain speed until the runway is under the tires.

I hope these suggestions might be of some help to you. I would be more than happy to assist you in your project in any way. Please feel free to contact me with any questions you might have. I am very interested in watching your progress on your website.

William (Bill) Buyak

Lehigh Acres, FL 33936

EAA 45105


Bill Buyak with his Skycoupe in the Empire State Aerosciences Museum (www.esam.org)


Above: The nicely-appointed and well finished panel in Bill's 'Coupe gives us something to shoot for.

Below: The Buyak Skycoupe at a fly-in in Vermont some years back.


Wednesday, October 5, 2011

Work Session 10/5/2011 - Left Wing Prep

Yesterday Terry, Jim, Joel, Nathan and Kent worked from 4-8 preparing the left wing for covering, which is planned for all day Saturday, 10/8/2011. Preparation work included bolting on the brackets for the fuselage and lift strut connections, installation of plastic conduit for future wiring needs, Scotch-Brite scuffing of all surfaces to come in contact with the PolyFiber fabric, setting protruding nail heads in leading edge sheeting, fabrication and bonding of additional spacers to buttress the butt rib, and fabrication and bonding of a mounting block for the pitot probe.

Our next work session will be on Thursday, 10/6/2011, from 4-8, where additional preparations will be made on the wing. We may even cover the rudder if time permits.

Please RSVP to kmisegades@bellsouth.net if you will be at the Skunk Works on Thursday and/or Saturday.

Does anyone have empty parts bins? We have acquired a large assortment of valuable, aircraft-grade fasteners that need to be sorted into such bins. This would make a great project for someone so inclined. We'd probably need 40-50 such bins, and some means to support these for easy viewing/use.


Jim and Joel needed an hour to get the fuselage mounting brackets to fit just right.


Joel and Nathan work on the electrical conduit, installed should we decide to add lights at a later time.


Terry and Joel test fit a spruce block that Joel fabricated to hold the pitot probe. It will allow easy removal should the relatively fragile pitot ever be damaged.

Below: Joel holds the block in place while Terry secures it with a vise while the epoxy cures. Clearly the crew was getting punchy by the late hour of the work. But the results look great!

Saturday, October 1, 2011

October 1st, 2011 Session: Wings Covering has started!

Our longest session ever, starting at 10 AM and ending after 9PM, bore fruit - the right wing is now covered. Thanks to all who stopped by, to be honest, we could have used a few more hands. Those who could not come yesterday will have an opportunity to cover the left wing in two weeks. We're taking off next weekend due to Terry's planned travel.

A special guest yesterday was the Skycoupe's previous owner, retired USAF / Airline pilot Larry Oppegaard, who lives in Greensboro. Larry shared his detailed knowledge of the airplane and the well-founded reasoning behind the numerous improvements he made over the original design. Larry was already an experienced homebuilder before working in the Skycoupe, and he is now considering a return to aviation with the construction of a Sonerai II, one of John Monnet's (of Sonex/Waeix fame) earlier designs. Larry sent the following comments:

Thanks to everyone for inviting me to hang out and watch the work on your Skycoupe. I felt very welcome, and really enjoyed the visit today.

I know the ‘Coupe is in good and capable hands, and I am sure you guys can complete it and fly it. The workmanship and care I saw displayed is of a high caliber, and will certainly give confidence when the time comes for its first flights.

You guys were an inspiration to me to get back into airplanes as a hobby. Again, Thanks for the hospitality and fellowship.

Best Regards,

Larry Oppegaard


BUSINESS MEETING - We plan to meet Monday, October 3rd at 7PM in the Bull Shack at Cox Field to discuss formal incorporation of the BCAC and financial matters. All who are interested in flying the Club's aircraft are urged to attend.


Our Skycoupe's former owner, retired USAF / airline pilot Larry Oppegaard of Greensboro. Larry was presented with an official Bear Creek Skunk Works T-Shirt in appreciation for his past workmanship and generous advice. He also pitched in on October 1st and stayed until dark. Larry's advice is already filling in some of the gaps in our knowledge of the airplane.


JP Bernoux and Konrad Schoen affix the fabric to the leading edge sheeting.


Mike McCann, Terry Gardner, Kent Misegades and JP Bernoux provided all eight hands needed while affixing the cloth to the wing's leading edge. We can not imagine covering an airplane with only two hands!


Konrad adds some finishing touches to the fabric.


Kent and Mike hold the cloth while Terry trims it with a straight razor around the wingtip.

Below: Margaret admires the result of 11+ hours of work - the finished, covered wing. The next step is to coat all surfaces with PolyBrush and then hang the wing in the rafters until we're ready for the silver coats.